
Advanced Usage
DFU recovery
DFU (Device Firmware Update) mode reinstalls JetKVM firmware over USB. Use it to recover a JetKVM with no microSD card slot.
If your device has a microSD card slot, follow the microSD recovery guide instead.
Recovery erases your settings and stored data. Back up anything you need before starting.
You need a computer, a USB data cable, and a thin pin. Connect JetKVM directly to the computer with the data cable.
1. Download the firmware
Download the latest JetKVM recovery image and save the .img file to your computer.
2. Enter DFU mode
- Unplug the USB cable from JetKVM.
- Locate the small hole on the right side of the device.
- Insert a thin pin into the hole and gently press and hold the button inside.
- While holding the button, reconnect JetKVM's USB cable to your computer.
- Keep holding for three seconds, then release.
The recovery tool should detect a MASKROM device.
3. Flash the firmware
Choose your operating system: Windows, Linux, or macOS.
Windows
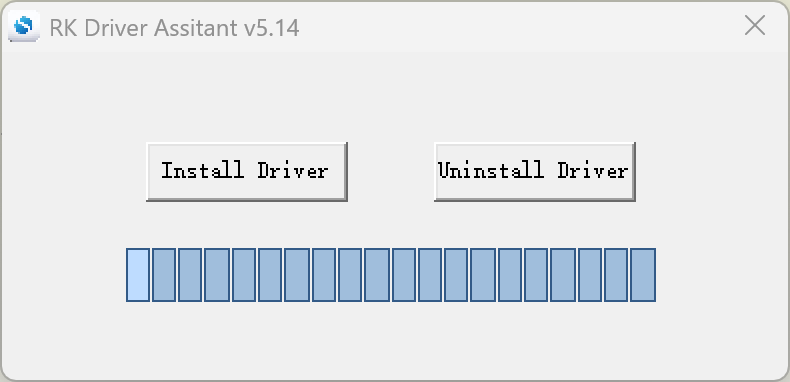
Install the USB driver
- Download and extract Driver Assistant v5.14.
- Open
DriverInstall.exeand approve the administrator prompt. - Click Install Driver and wait for it to finish.
Open RKDevTool
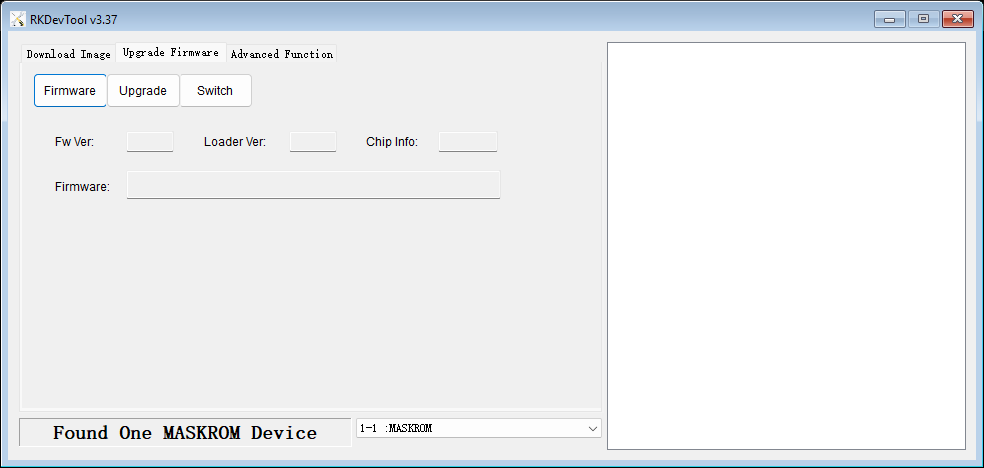
- Download RKDevTool v3.37 (ZIP).
- Right-click the ZIP and choose Extract All. Open
RKDevTool.exefrom the extracted folder. - Select the Upgrade Firmware tab.
Flash the firmware
- Connect JetKVM in DFU mode. Check that the status says Found One MASKROM Device. If it says No Devices Found, see Device not detected.
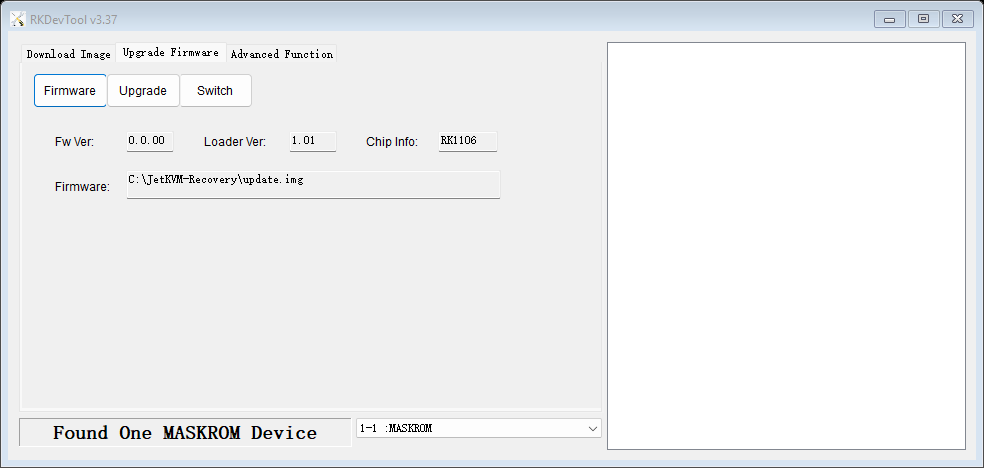
- Click Firmware and select the downloaded
.imgfile. Wait for it to load. Chip Info should showRK1106.
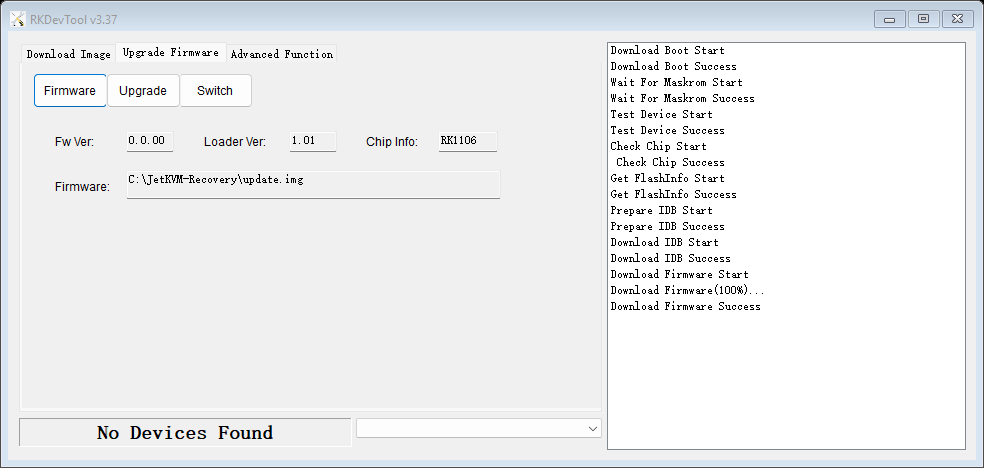
- Click Upgrade.
- Keep USB connected and the computer awake until the log says Download Firmware Success. JetKVM restarts automatically.
Linux
- Clone the JetKVM system repository and enter the tool directory:
git clone https://github.com/jetkvm/rv1106-system.git
cd rv1106-system/tools/linux/Linux_Upgrade_Tool
- Check that JetKVM is detected:
sudo ./upgrade_tool ld
- Flash the image, replacing the path with your downloaded
.imgfile:
sudo ./upgrade_tool uf "/path/to/your/firmware.img"
Wait for Upgrade firmware ok. before disconnecting USB.
macOS
- Download and extract upgrade_tool v2.44 for macOS.
- Open Terminal and change to the extracted folder containing
upgrade_tool:
cd "/path/to/extracted/folder"
- Check that JetKVM is detected:
sudo ./upgrade_tool ld
- Flash the image, replacing the path with your downloaded
.imgfile:
sudo ./upgrade_tool uf "/path/to/your/firmware.img"
Wait for Upgrade firmware ok. before disconnecting USB.
Troubleshooting
Device not detected
- Re-enter DFU mode, holding the button before connecting USB and for three seconds afterwards.
- Try another USB data cable or USB port. Avoid hubs and power-only cables.
- On Windows, reinstall the driver with Driver Assistant, reconnect JetKVM, and reopen RKDevTool.
- Disconnect any other Rockchip recovery devices.
Windows blocks a download
Leave the file quarantined and keep Defender enabled. Use the Linux or macOS instructions instead.
Flashing fails
If the image will not load, download it again from step 1 and select it under Upgrade Firmware → Firmware.
If flashing fails, save the error message, check the USB cable, and re-enter DFU mode before retrying.